The Eposnow JS API is a library for use with our API. It is designed to increase the speed and ease of creating custom applications, plugins and integrations to improve your business or to offer to others on the Eposnow App Store.
Advantages of using the library over writing your own:
In order to use the library you will need to include a reference to it in your code, there are two ways to do this depending on what suits your need.
If you are writing a HTML page that uses our API, you can include the reference to the library in the
<head></head> section of your HTML file, as shown below. It is important to remember that jQuery must be included before the Eposnow JSAPI script:
         <head>
            <script type="text/javascript" src="https://code.jquery.com/jquery-1.11.2.js"></script>
            <script type="text/javascript" src="https://www.eposnowhq.com/scripts/app/EposnowJSAPI.min.js"></script>
         </head>
If you are just writing some JavaScript code to be executed, you can include a reference to the library to be loaded within your JavaScript. This can be achieved with the following code, presuming you have jQuery available as per the requirements. You must also do this before you attempt to use any of the API functions.
$.getScript("https://www.eposnowhq.com/scripts/app/EposnowJSAPI.min.js");
Before you can call any of the API functions, you will need to provide your API access token. This is only necessary if this is an application you are writing for yourself, you must not set your access token if you are planning on releasing this application on the App Store; as other customers will have their access token automatically picked up and used by the JS library.
During development this will still be necessary to do so you can test, however, once you have finished your application, remove any code in that sets your access token.
To set your access token, simply use the code below, substituting the example token for your token.
           var token = "NEhTQkVCSElNR0swOFFTNzhdNDJNRlkyMkVQT04aSTc6RV2IVEJFVE9SUktWV0pDSU0xUFNHTFQxMkpPME8xRkx=";
           EposnowAPI.setAccessToken(token);
By default, the library uses the latest version of the API. If you need for any reason to use a different version of the API you can do this with the following code:
           var version = 1;
           EposnowAPI.setVersion(version);
Once this has been set, you won’t need to set it again until the page is reloaded, or the session ends. You can change the version you are using as much as you like within your code to suit your needs, however it is rare you would need to do this.
Setting the library version may cause certain features to become unusable, as they are version specific.
If you are creating code that is to be used as an application within Eposnow, e.g. as an app available on the App Store, then you may need to use your App Settings. If you are not creating code to be used as an application within Eposnow then this section is not relevant to you.
App Settings are a way of persisting user settings for your app between page loads and sessions. App Settings are custom JSON objects, and therefore can be made up of anything you like, provided that it is stored in valid JSON format. An example of this might be to store the following App Settings for each of your users:
ShowFavourites (Boolean), FavouriteProducts (Array of product IDs), FavouriteColor (String)
This would be stored in your app settings as a JSON object in the format:
            {
                "ShowFavourites": "true",
                "FavouriteColor": "Blue",
                "FavouriteProducts": [
                                       {"ProductID":"1"},
                                       {"ProductID":"2"},
                                       {"ProductID":"3"}
                                     ]
            }
To save your app settings, you can use the AppSettings.save() function. Again, these app settings are user specific, not app specific, so each user of your app will have their own App Settings for your App, but you can control what these settings are in your code for each user.
You can pass this function your App Settings as a JavaScript object, or as a String of valid JSON as shown in the example below:
         var myAppSettings = {"ShowFavourites":"true","FavouriteColor":"Blue","FavouriteProducts":[{"ProductID": "1"},{"ProductID":"2"},{"ProductID":"3"}]};
         EposnowAPI.AppSettings.save(myAppSettings);
To load your users App Settings, simply call the load function. This function will always return to you your App Settings as an object, allowing you to modify individual fields of your App Settings without having to traverse a JSON string. To load your app Settings, use the following code:
var settings = EposnowAPI.AppSettings.load();
Once you have your object, you can add or remove properties from it as would normally in JavaScript. Here is an example of adding a new property and then removing another from the AppSettings shown above.
            //Create your App Settings
            var myAppSettings = {"ShowFavourites":"true","FavouriteColor":"Red","FavouriteProducts":[{"ProductID": "1"},{"ProductID":"2"}]};
            //Save your App Settings
             EposnowAPI.AppSettings.save(myAppSettings);
            //Load App settings to check they saved
             var settings = EposnowAPI.AppSettings.load();
            //Add new property "FavouriteFood"
             settings.FavouriteFood = "Tomato";
            //Remove existing property "FavouriteColor"
             delete settings.FavouriteColor;
This would result in your JSON object having a new property called FavouriteFood and losing the property FavouriteColor. This can be seen by looking at the JSON string representation of your modified object:
{"ShowFavourites":"true","FavouriteFood":"Pizza","FavouriteProducts":[{"ProductID": "1"},{"ProductID":"2"},{"ProductID":"3"}]};
If you do modify your App Settings after you have loaded them, ensure you save them after, otherwise you will lose changes.
Each controller in the API has a corresponding object model which can be used to help organise your variables and ensure that all the correct properties are used. To make using the API easier and to save time in creating your own objects for each of the controllers you can use the JS API models to quickly create representations of Eposnow objects, such as Products, Brands and Staff etc.
Here is an example of creating a new Brand object using the JS API.
    var myNewBrand = new EposnowAPI.Brand();
    myNewBrand.Name = "Eposnow";
    myNewBrand.Description = "EPOS specialists";
If you are creating a new object, you will not need to give it an ID, for example with the Brand we have just made we have not assigned anything to BrandID, this is because it is a primary key that is auto assigned when created by our servers.
These object models are also useful for getting objects from the server in the correct format ready for use. Here is an example of getting a Brand from the server by ID and then printing out the Name.
    var brandID = 5;
    var myBrand = EposnowAPI.Brands.get(brandID);
    console.log(myBrand.Name);
There are many available controllers from the API, with more being added frequently. Please check Documentation for available controllers.
It is important to note that not all controllers or API actions are available using each version of the API, you can select the version of API you intend to use on the developer site and you will be shown relevant controllers and API interactions for the selected API version. As previously mentioned, there are no restrictions on the amount of times you can change API version using this library.
There are 4 main interactions with the API that can be achieved using this library, these are:
All controllers are accessed using the pluralised version of the object name. Singularised names are for creation of the object models themselves. For example, to create a new product you would use: EposNowAPI.Product
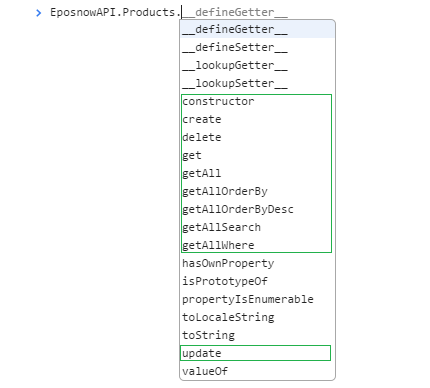
To call the product controller of the API to create, update or delete a product object, you would use: EposNowAPI.Products.
The formats in which you call the API are the same for each controller.
To show this, we will use the Product controller as examples, but you can follow the same format for any other controller such as Staff or Booking.
You can use the get functions to retrieve existing objects from the server. If you know the ID of the object, then you can request that object specifically, otherwise you can get a list of the first 200 objects returned (details on how page will be covered further below).
    //Assign first 200 products to an array
    var allProducts = EposnowAPI.Products.getAll();
    //Access first product in array
    allProducts[0];
    //Send Get request to server for specific product if ID known
    var productID = 5;
    var myProduct = EposnowAPI.Products.get(productID);
You can also make use of these additional get functions if necessary.
    getAllOrderBy
    getAllOrderByDesc
    getAllSearch
    getAllWhere
Calling this function on a controller will return all object, similarly to getAll() but will order them ascendingly based on the column you wish to sort by. Here is an example of getting all products, sorted ascendingly by SalePrice:
var allProducts = EposnowAPI.Products.getAllOrderBy("SalePrice");
This is the same as above, but orders descending. Here is an example of getting all products sorted descending by SalePrice:
var allProducts = EposnowAPI.Products.getAllOrderByDesc("SalePrice");
This function enables you to search a collection of objects for a term, and then return all matching results. This is an exact search. For example, returning all products that have SalePrice of 0:
var freeProducts = EposnowAPI.Products.getAllSearch("SalePrice", 0);
The parameters for this function are getAllSearch(FIELD, TERM);
You can also search by multiple values e.g. getAllSearch([FIELD1,FIELD2],[TERM_FIELD1,TERM_FIELD2]);
This function enables you to query a collection of objects and then return all matching results. This is a more flexible search. For example, returning all products that have SalePrice greater than 0:
var notFreeProducts = EposnowAPI.Products.getAllWhere("SalePrice", ">" ,"0");
The parameters for this function are getAllWhere(FIELD, OPERATOR, TERM);
You can replace the middle parameter (> in this example) with the following operators:
As mentioned, only the first 200m results are returned from the API by default. IF you have more results than this you will need to page through them. This can be done by specifying a page number in any of the GET functions, except the GET function that only returns a specific object by ID.
To do this, simply add an additional parameter on the end of your function call specifying the page number you would like. For example:
     //Get first 200 products
    var allProducts = EposnowAPI.Products.getAll();
    //Get the next 200 results
    var allProducts = EposnowAPI.Products.getAll(2);
    //Create product
    var product = new EposnowAPI.Product();
    //Set required fields
    product.Name = "Test Product";
    product.CostPrice = 10;
    product.RRPrice = 15;
    product.SalePrice = 15
    product.EatOutPrice = 15
    //Create product and assign created object back to existing variable
    product = EposnowAPI.Products.create(product);
Continuing from the create object code previously shown:
    //Update a field
    product.Name = "Test Update"
    //Send update to server
    EposnowAPI.Products.update(product.ProductID, product);
Continuing from the update object code previously shown:
    //Send delete request
    EposnowAPI.Products.delete(product.ProductID);
If you are using version 2 of the API you may wish to send complete transactions to Eposnow using the API. This is different to the normal transaction controller as it allows you to send a transaction, as complete, in one API call rather than having to use multiple API calls.
Documentation on this can be found here
To send a complete transaction using this JS library, please use the CompleteTransactions functions rather than the transactions functions.
If you call a function incorrectly, or something goes wrong, check the console output in your debugging application to see the error message.
You may receive error messages for things such as:

