A Webhook is a HTTP notification which is set up to notify a third-party application whenever a specific event occurs. Webhooks allow any application(s) to react to events occurring in a centralised cloud-based application. For example, this means that you could set up Webhooks so that whenever a booking is created, updated or deleted in Epos Now, your Calendar application could automatically reflect this.
EposNow Webhooks are currently in Beta and initially expose only a few events which can trigger a Webhook to be sent. Webhooks on their own will not do anything - you must have some kind of application listening for, and reacting to, them. For testing purposes, a site like http://requestb.in may be useful to forward your Webhooks to, this will allow you to view the data which is sent by our Webhooks without the need for you to implement a full listener service.
You must create a device of type ‘API’ in order to send Webhooks. Each device allows you to set a base API URL to which your Webhooks will be sent. If you wish to send your Webhooks to multiple domains, you will need to create multiple API devices.
When creating the device, you must also select an API Version & MIME Type.
After creating a device, you will be taken to the Web Integrations -> API -> REST API page. At the bottom of this page, you can see and manage all of your API devices.

From here you can select your device’s Webhooks, Advanced and Access Credentials buttons.
Push the Webhooks button - you will be taken to a list of your Webhooks which is initially empty. You can later edit or delete your existing Webhooks from this page. Push the Add Webhook Trigger button to create a new Webhook trigger.
The ‘Add Webhook Trigger’ page allows you to specify an event which you wish to trigger the firing of a Webhook.
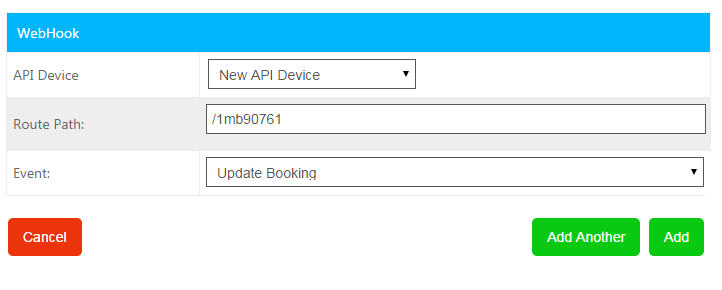
The Route Path is the path, relative to the device’s API URL, to which the Webhook should be sent. As it is a relative path, it must begin with a “/”. The Event is the type of event which should trigger the Webhook to be fired.
Once a Webhook has been added to your API device, any event within the Epos Now software that is relevant to that Webhook will trigger the automatic sending of a Webhook to your defined end point. The end point is defined by the API Device’s API URL and the Webhook triggers Route Path.
If you wish to view a Queue of your Webhooks, this can be done from the Backoffice by navigating to Web Integrations -> API -> Webhook Queue
This shows a list of sent Webhooks. You can click the Details button on any entry to see detailed information about the data which was sent. You may also choose to resend any failed Webhooks.
WebHooks are sent to your end-point as HTTP POST requests. At your end-point, there are some HTTP headers which you should parse in order to understand the data. These are:
The content of the message is then formatted as specified in the Content-Type header, dependant on the type you set in your Backoffice. So be prepared to deserialize data in that format, for example JSON.
Typically, you would switch on the Epos-Object and Epos-Action headers, and implement your logic for each case.

